Posts

Showing posts from July, 2025

4 Awesome Solutions for Grown-Out Balayage

Image
Balayage continues to be one of the most popular hair color trends—and for good reason. This hand-painted highlighting technique adds soft dimension and natural-looking brightness to the hair. But as your hair grows, even the most flawless balayage will eventually begin to shift, leaving you with a grown-out look. Luckily, grown-out balayage doesn’t mean the end of good hair days. In fact, it opens the door to several stylish solutions. In this post, we’ll share 4 awesome ways to fix or refresh grown-out balayage —from subtle touch-ups to bold changes. What Is Balayage? Balayage is a freehand coloring technique that creates a soft, blended transition from darker roots to lighter ends. The term comes from the French word balayer , meaning “to sweep,” referring to how stylists brush color onto the hair. Unlike ombre (a style with a more distinct contrast between dark and light), balayage blends color throughout the hair in a natural, sun-kissed way. Because it doesn’t start at the ro...

How To Wash Hair With Tape-In Extensions

Image
Washing your hair properly is essential when you have tape-in hair extensions—not just to keep your hair clean and fresh, but also to extend the life of your extensions, potentially up to 6 weeks. Unfortunately, many people unknowingly damage their tape-ins by washing them incorrectly. That’s why in this guide, we’ll show you how to wash your tape-in hair extensions the right way—so you can care for your hair better than 80% of people out there. Let’s get started! Step-By-Step Guide to Washing Tape-In Hair Extensions 1. Brush Your Hair Before Showering Even with high-quality tape-in extensions, tangles can happen. Before washing, always brush your hair thoroughly to remove knots. This step not only prevents additional tangling during the wash but also helps shampoo distribute evenly. Use a detangling brush or a wide-tooth comb, starting at the ends and gently working your way up. 2. Shampoo Gently—From Scalp to Mid-Length When it comes to shampooing, more isn’t always better. T...

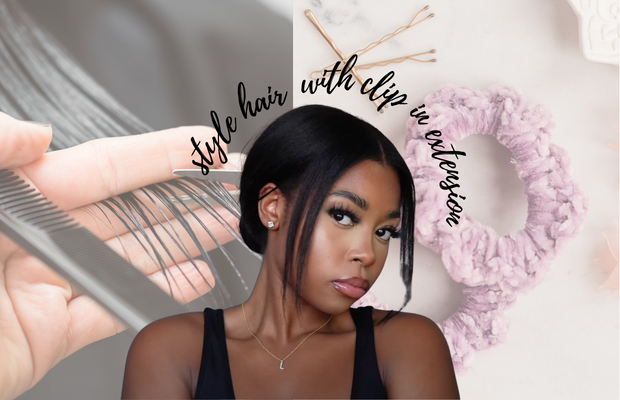
How to Style Hair with Clip-In Extensions Like a Pro

Image
Are you dreaming of fuller, head-turning hair? Clip-in hair extensions are one of the quickest and easiest ways to add instant volume and length to your natural hair - without the commitment. In this guide, we'll walk you through how to style your hair with clip-in extensions step-by-step, from prep to finish, so you can get a flawless, natural look every time. Prepare Your Hair Before Styling Before you begin, make sure your natural hair is clean and tangle-free. Wash your hair with a mild shampoo and a conditioner that suits your hair type (dry, oily, or normal). Focus the conditioner on the mid-lengths and ends to hydrate and smooth the strands. Gently towel-dry your hair - don’t rub, just pat. Once damp, detangle with a wide-tooth comb or paddle brush, starting from the ends and working your way up. This will make your hair more manageable and ready for a seamless blend with your extensions. Section Your Hair Using your fingers or a rat-tail comb, create a horizontal part about...

Why Low Ponytails Are Better Than High Ponytails

Image
  Ponytails are timeless, effortless, and perfect for keeping your hair off your neck - especially on hot days. While high ponytails offer a bold and sleek look, low ponytails are gaining more popularity thanks to their versatility, comfort, and long-term hair benefits. Let’s explore why  low ponytails may be a better choice than high ponytails , and how you can style them with ease. High Ponytails: Sleek But Stressful High ponytails are chic and stylish. Many celebrities wear them on red carpets and runways, and they do a great job of highlighting your facial features - jawlines, brows, and cheekbones. However, high ponytails often come with drawbacks: -  Scalp tension:  The tight pull around your hairline can cause stress, leading to headaches, breakage, and thinning over time. -  Hairline damage:  Repeated tension can result in receding hairlines and weakened strands. -  Short-term comfort only:  While they feel light and fresh, they can quickl...

Can You Sleep With a Wig On Without Causing Hair Damage?

Image
Wearing a wig can be a time-consuming process - especially when it involves gluing and styling. That’s why many wig wearers prefer to keep their wigs on overnight rather than removing and reinstalling them daily. But is it safe to sleep with a wig on? While it’s technically possible to sleep in a wig, hair experts generally advise against it. Sleeping with a wig - especially without proper care - can lead to tangling, frizz, dryness, and reduce the overall lifespan of your unit. Still, if you choose to wear a wig overnight, there are ways to protect both your wig and natural hair. How To Sleep With a Wig On (The Right Way) If removing your wig at night isn't ideal for you, follow these simple tips to reduce damage while sleeping: 1. Wrap Your Wig Securely Friction from tossing and turning can cause serious wear and tear. To prevent this, gently braid or tie your wig into a loose ponytail, then wrap it in a satin or silk scarf to protect the strands from rubbing against your pi...

Pro Guidance On How To Melt Lace

Image
One of the most essential steps to slaying a lace wig is learning how to melt the lace properly. If the lace isn't applied correctly, it will be visible and instantly ruin the natural look you’re going for. That’s why mastering the lace melt technique is a must. In this blog post, we’ll walk you through how to melt lace like a pro—from prep to finish. Why Lace Quality and Color Matter Before you begin, pay attention to the type and color of lace you’re using. Not all lace is the same. Thinner lace like HD lace or transparent lace blends much more naturally into the scalp. If you’re using standard lace, make sure it matches your skin tone as closely as possible to avoid noticeable edges. Step-by-Step: How to Melt Lace 1. Start with a Wig Cap Use a wig cap that matches your skin tone. You can cut small holes for your ears so it lays flat against your scalp. 2. Secure the Cap Spray freeze spray over the cap and blow dry it until it's firm. Then trim off the excess along y...