Step By Step Guide: How To Cut A Lace Front Wig

What You'll Need
-
Large clips or hairpins
-
Rat-tail comb
-
Sharp scissors, eyebrow razor, or wig shears
-
Wig head (optional but recommended)
-
Foaming mousse or water spray
-
Makeup pencil or white eyeliner pencil
1. Prepare the Wig
On Your Head:
-
Place the wig on your head, ensuring the lace extends slightly beyond your natural hairline.
-
Secure the wig using its adjustable straps and clips.
-
Pull the wig's hair back from your face and clip it to keep it out of the way.
On a Wig Head:
-
Place the wig on a mannequin head and secure it with T-pins to prevent movement.

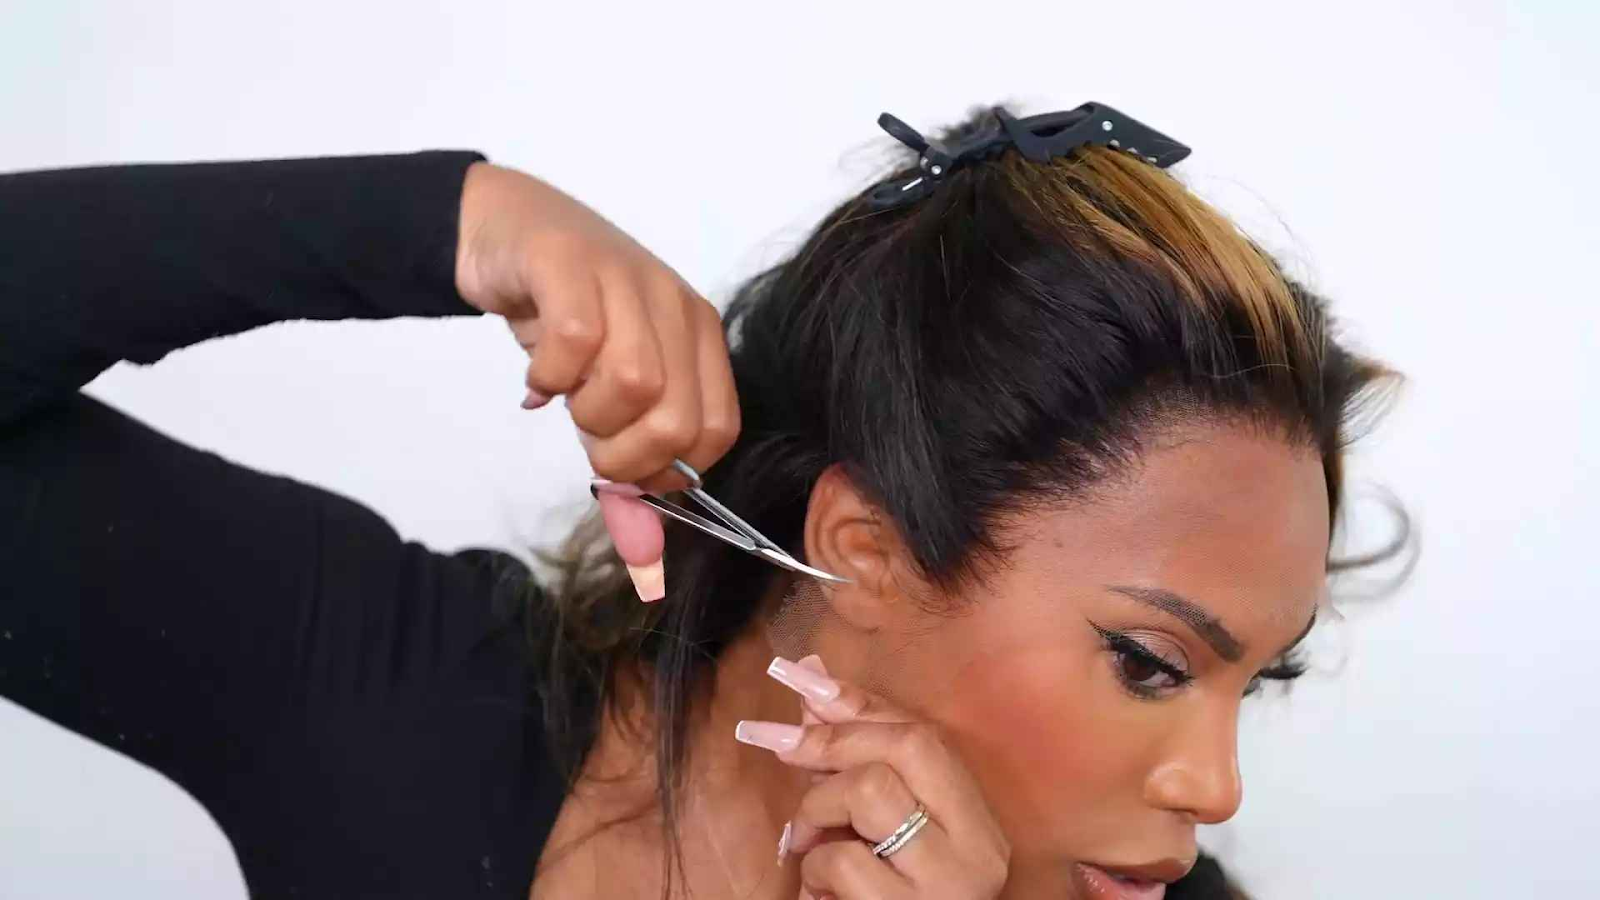
2. Remove the Ear Tabs
-
Use the pointed end of a comb to part the wig's lace just above your ear.
-
Pin the hair back, leaving a small tab of lace over the ear.
-
Cut around the contour of your ear using scissors, then remove the tab to help the wig lay flat during cutting and installation.
3. Mark the Hairline
-
Using a makeup pencil, draw your natural hairline from ear to ear on the lace, leaving about a quarter-inch gap between your hairline and the traced line.
-
If using a mannequin head, wear the wig and draw the line on top of the lace in front of your natural hairline. This will serve as a guide when cutting.

4. Cut the Lace
-
Make small, zigzag cuts along the marked line to create small sections, making it easier to cut and preventing snags or jagged edges.
-
Pull the lace taut and gently cut each section along the hairline to avoid accidentally cutting into the hair.
-
Avoid cutting perfectly straight lines, as they can appear less natural.
-
If you're not confident cutting the lace in one piece, cut it in small sections to make the process easier.

5. Final Touches
-
After cutting, check the fit of the wig on your head.
-
If necessary, trim any excess lace or adjust the hairline for a more natural look.
-
Secure the wig using your preferred method, such as adhesive or clips.


Comments
Post a Comment